Knowledgeable on tech things including but not limited to Linux, Windows, OS X, Xbox 360, Video Production (Linux Tech and Gaming Podcast), Console and PC Gaming, Graphics (GIMP), iDevices, Geo Caching, Networking (Consumer level), and Audio/Video setups.
I do it all and I do it with Open Source Software but I'm not against using proprietary solutions if they get the job done and done efficiently.
Some may yell at me for wanting to play PC games with a controller. They all say, "PC games are meant to be played with a keyboard and mouse." Well I grew up playing console games which always had a controller. It's not due to the lack of trying but when I play with keyboard and mouse my movement is less than adequate and my fingers don't have the buttons memorized yet so I end up dieing because I didn't move away from an enemy quick enough. W, S, D, and A are the buttons normally used in PC FPS games for moving forward, backward, and strafing side to side. The mouse is used for where your eyes are looking and or where your gun shoots. So until I get better with a keyboard and mouse I'd like to play my PC games with a controller at times.
I was happy to see that Serious Sam 3 BFE (a first person shooter) had controller support. Most Steam games will denote whether a game has controller support or not. Sometimes it may say "Partial Controller Support". I am not certain what that means but some controller support is better than none in my opinion. I took a chance and bought the game. When I fired it up my After Glow Xbox 360 Controller was supported immediately upon turning on the game. This is with a default Ubuntu 12.04.3 installation, it uses the xpad module (driver) and I didn't have to install the xboxdrv module (driver) which is a userspace driver. There are some advantages to using the xboxdrv module but I won't cover those in this post.
Other games I quickly found the same controller did NOT work in, notably all the Source Engine Games by Valve. The ones I tried were Team Fortress 2, Portal, and Left 4 Dead 2 the controller did not work. I tried everything, from opening the console in game and entering "exce 360controller" and "exec 360controllerlinux" to allowing world readable permissions on the /dev/input/event11 device node which is what the controller was plugged into but nothing was working. Well after many hours of googling and trial and error I found what finally solved the controller issue for Valve's Source Engine Games. The original solution has to be credited back to a google post just to give credit where credit is due.
First open the Steam Client and you'll notice that there is a place to click to activate Big Picture Mode, it's located on the upper right side of your Steam Client.
Click that and it will activate Big Picture Mode which is basically Steam running in fullscreen. Use your mouse and click on the little gear symbol in the upper right corner which is where all the settings are. Now click on Controller. Next you'll see the following picture and hopefully it states that your controller is detected. If not, sorry I can't help any further, you'll have to investigate why Steam can't detect your controller.
Click on edit controls and you'll be taken to this screen.
You just go down the list, Steam shows the button on the screen in green and you click that corresponding button on your wire connected Xbox 360 controller. I am not sure whether this works with a wireless controller due to the Microsoft's wireless technology of the controller, you'll definitely need a wireless dongle from somewhere if they even make them. Once you have mapped each button then click save, you can choose to give it a name or overwrite the existing name that was there. Now you are all done.
You can now use your controller within Team Fortress 2, Portal, and Left 4 Dead 2. One thing to note was that I did have to increase the sensitivity within TF2 because the movements were really slow but other than that I am very pleased I got the controller working.
Hello there fellow tech nerds. How has everyone been doing lately? I have been thrilled with life lately and I hope you as well.
Todays post is going to cover how to capture hd video (720p) from a component video source onto your Linux computer so that you can edit it with video editing software. I do this to capture my Xbox 360 gameplay. I use a microphone and audacity to record commentary separately. I then edit the video files captured from the HD-PVR and the audio commentary together using Kdenlive, then render it and upload the videos to YouTube. I do this to help others with certain parts of a game or just provide general tips about a particular game. So let's get right into it.
First you'll obviously need an Hauppauge HD-PVR but it has to be model number 1212 (the wiki states that model# 1445 is also supported but I don't see that as a model# on the Hauppauge Support page), the newer ones (HD-PVR2) don't have linux drivers so there is currently no way to capture from them. Luckily if you're using a recent Linux distribution the driver that allows this to work is built right into the Linux kernel. Any kernel 2.6.30 or above and the driver is included within the kernel. I am running Xubuntu 12.04.3 with kernel 3.7.0-030700-generic. You may possibly need a Windows computer to upgrade the firmware on the HD-PVR which is done by running a Windows executable file from Hauppauge's Support Page which installs the driver but it also updates the firmware within the HD-PVR. The latest firmware is preferred, it's all explained HERE.
Step 1 (determine current firmware on your HD-PVR)
Open a terminal window and plug in your HD-PVR preferably into a USB2.0 port (I don't think USB1.1 is fast enough. I had issues using a USB3.0 port in which it would stop recording by itself so try to avoid if you can or try it out and see for yourself), type in
dmesg
Mine returns the following information
[6307.550581] usb 1-3: new high-speed USB device number 13 using ehci_hcd
[ 6307.727776] usb 1-3: New USB device found, idVendor=2040, idProduct=4903
[ 6307.727779] usb 1-3: New USB device strings: Mfr=1, Product=2, SerialNumber=3
[ 6307.727781] usb 1-3: Product: Hauppauge HD PVR
[ 6307.727783] usb 1-3: Manufacturer: AMBA
[ 6307.727784] usb 1-3: SerialNumber: 00A49D0D
[ 6307.755504] hdpvr 1-3:1.0: firmware version 0x1e dated Mar 7 2012 08:25:15
[ 6307.755507] hdpvr 1-3:1.0: untested firmware, the driver might not work.
[ 6307.869496] hdpvr 1-3:1.0: magic request returned 8
[ 6307.878237] hdpvr 1-3:1.0: config call request for value 0x1700 returned 1
[ 6307.887215] hdpvr 1-3:1.0: config call request for value 0x1500 returned 1
[ 6307.922052] hdpvr 1-3:1.0: config call request for value 0x1200 returned 1
[ 6307.931548] hdpvr 1-3:1.0: config call request for value 0x1300 returned 1
[ 6307.940780] hdpvr 1-3:1.0: config call request for value 0x2900 returned 1
[ 6307.950518] hdpvr 1-3:1.0: config call request for value 0x2a00 returned 1
[ 6307.958510] hdpvr 1-3:1.0: config call request for value 0x2b00 returned 1
[ 6307.967748] hdpvr 1-3:1.0: config call request for value 0x2c00 returned 1
[ 6307.977615] hdpvr 1-3:1.0: config call request for value 0x2d00 returned 1
[ 6307.996731] hdpvr 1-3:1.0: control request returned 4
[ 6307.997589] hdpvr 1-3:1.0: no valid video signal or device init failed
[ 6308.007835] hdpvr 1-3:1.0: control request returned 1
[ 6308.025559] hdpvr 1-3:1.0: control request returned 1
[ 6308.025561] hdpvr 1-3:1.0: allocating 64 buffers
[ 6308.052476] hdpvr 1-3:1.0: device now attached to video1
[ 6308.052495] usbcore: registered new interface driver hdpvr
The hdpvr module should have autoloaded once you plugged in your HD-PVR, if it didn't we can load it manually by issuing
sudo modprobe hdpvr
Nothing will appear to happen if all went well but to verify it's loaded you can issue
If it didn't you'll have to figure out what's wrong with the hdpvr module within the kernel you're using and this tutorial won't cover that sorry.
So according to my dmesg output and the HD-PVR MythTV wiki I am running the latest firmware already. This is a good thing. If you're not running a firmware dated Mar 7 2012 then I suggest updating the HD-PVR firmware because it can fix various issues as well as fix color and saturation issues with previous firmwares. I am not sure this would work within a Virtual Machine so if you don't have a Windows computer see if you have any friends or family that would allow you to use it. You would just need to bring the HD-PVR with you, along with it's USB cable and if they had internet you could download the latest driver that linked to earlier, hook up the HD-PVR and run the .exe driver installer and it will update the HD-PVR with the latest firmware. If you can't for whatever reason update the firmware it's ok, you can still move forward with the tutorial just note that if issues arise it may be related to the old firmware on the HD-PVR. NOTE: Certain kernels (kernel lower than 3.3) and firmware combinations may also result in color and saturation issues as well, those issues can be read about HERE.
Step 2 (setting some sane defaults for the HD-PVR)
The way we set the module (a module is equivalent to a driver in Windows) defaults at least within Ubuntu is by creating a *.conf file and storing it within /etc/modprobe.d/. The *.conf file will be read by the kernel when it loads the hdpvr module. The settings that can be set are all listed HERE. Create the *.conf file
gksudo leafpad /etc/modprobe.d/hdpvr.conf
You can name it whatever you want but I named it hdpvr.conf so that I know what the conf file is for. I used leafpad but you can use whatever GUI text editor that's installed on your system. I run Xubuntu so the default editor is leafpad, yours may be gedit if you run straight Ubuntu.
within the file paste the following
I enabled the least log info possible while still showing some debug info (useful for troubleshooting). Since I have a webcam always connected I made the HD-PVR video device node 1 (will show up as /dev/video1). I want to capture the component input (versus composite-yellow, white, red) and finally I want to capture the audio from the rear RCA ports NOT the front ones. You can set those settings to match your system and situation. In order for the settings to take effect without having to reboot your machine you can issues the following to reload the hdpvr module which will then use your settings.
sudo rmmod hdpvr
That will unload the module
sudo modprobe hdpvr
That will load it again using the settings from the *.conf file you created.
Step 3 (capture some video)
Unfortunately for now there is no nice little GUI (Graphical User Interface) application that captures the HD-PVR video stream although I am in talks with the developer of SimpleScreenRecorder to see if he can incorporate capturing the HD-PVR with his application. So for now it's a pretty basic command in which we have to use the terminal. For this to work your user that you log in as needs to be part of the video group. I'm sure you can google how to achieve this as it's not hard but this tutorial won't cover that. So open a terminal window, then we want to change directories to where ever you want the recording to be saved. Ensure there is an ample space free within this folder since capturing HD video takes up a lot of space. It's around 500 megabytes (that's .5 gigabyte) of space for around a 10 minute video. That's done with
cd /home/username/Videos/
You obviously need to change the username to be YOUR username and ensure the full path is writable by you. So I have a Videos directory located in my home directory which I have write permissions to. Normally any folder within your entire home directory is writable by you. The command to capture the video is
cat /dev/video1 > video.ts
The Linux cat command concatenates and lists files. Basically we're using cat to spit out whatever is at /dev/video1 which in this case will be the video stream from the HD-PVR. The little forward pointing arrow ">" is the linux command called redirect. It redirects input somewhere else. So in this case it's taking the video stream from the cat command and redirecting it into a file called video.ts. That's pretty much it, whenever you want to stop recording you simply hit the control key plus the letter c (ctrl+c) which tells it to cancel the command.
Congrats, you now have a video file called video.ts which contains whatever was being displayed from your video device. In regards to the video and audio specifications the HD-PVR can record up to 1080i. Personally I prefer 720p over 1080i since the p means it's progressive which can lead to less flickering. It boils down to what resolution you're inputting into the HD-PVR, it has a passthrough, meaning whatever you're inputting in the HD-PVR that same signal will get passed out to a TV to view. At that same time the video is encoded within the device using h264 codec for the video and aac codec for the audio. The encoding information for the HD-PVR can be read about HERE, it's all in the 2nd and 3rd paragraph if you're interested in learning about the bitrate, resolutions, codec etc etc. So in my example I play my Xbox 360 as 720p so the video.ts file contains an hd video which is HD quality (720p). Now go and create some masterpiece videos and showcase them on YouTube for the world to view.
Here's a sample of my work all done using Xubuntu Linux
Skip to "Let the tutorial begin" if you don't want to read any back story.
First I'd like to say sorry to those that follow this Blog, I have not posted in a very long time. I've been really hip deep in my YouTube Channel and gaming (both in Linux and on Xbox 360) so I haven't had much to blog about in terms of technology goes. I am hoping to get a post up about SteamOS and other technology related stuff very soon but let's start with this post for now.
I was debating what to title this post exactly since theoretically it could be used to transfer other Linux distributions as well and heck, it may even work to transfer a Windows OS or even OS X installation to another hard drive but I figured I would only cover exactly what I did since I know it works. This post will go over the steps I took in order to successfully change from a small IDE 40GB hard drive to a larger SATA 160GB hard drive AND at the same time changing ALL my computer hardware as well.
A little backstory first. I built my 4th computer in 2007 and believe it or not I have been using that ever since. With my recent YouTube adventures and getting into more PC gaming the computer started to really show it's age as I couldn't play certain games and rendering videos for YouTube took forever and a day. So I finally decided I needed to upgrade everything. I was planning on saving my money for Black Friday or Cyber Monday but a deal for a used computer sprang up out of no where and for a really good price I might add. For a mere $200 I could get a completely new tower. The main specs of the tower are as follows:
Sentey Modtower case with 7 fans
AsRock Extreme6 FM1
AMD A8-3870k 3.00Ghz
G-Skill Sniper 2133Mhz DDR3 RAM (2x4GB totalling 8GB)
XFX HD5750 1GB DDR5
OCZ Synapse Cache SSD 64GB
400w PSU that powers the motherboard and GPU
380w PSU that powers everything else
My current Xubuntu 12.04.3 was currently on a 40GB IDE hard drive and since the new motherboard didn't have any IDE's ports I would need to figure out what to do to transfer my operating installation to my new used hardware. I found a 160GB SATA hard drive in another computer of mine, moved all the data of it onto my Western Digital My Book World Edition (a NAS basically) and I was ready to move my Xubuntu installation from the small 40GB drive to the larger 160GB drive.
Let the tutorial begin
Things needed
-A computer to create the live usb sticks
-You'll need a minimum of (2) 1GB flash drives (to run live usb versions of clonezilla and linux-secure-remix from) OR an optical disc such as cd-rom or a dvd....assuming your computer has an optical drive. You could use the same 1GB stick for both clonezilla and linux-secure-remix BUT it will take more time since you have to use linux-secure-remix in between using clonezilla.
-A storage location large enough to backup the images of your partitions (network storage OR local external hard drive)
-Clonezilla (I choose amd64 because the computer I was running the live usb stick from had a 64bit chip. If you aren't sure it's ok to choose the i686pae version)
-Linux-Secure-Remix (choose linux-secure-13.04-64bit if the OS you're moving is a 64bit OS or choose linux-secure-13.04-32bit if the OS you're moving is a 32bit OS)
Alright, so I trust you downloaded the software you'll be using from above and we're ready to get going.
Step 1 (install new hard drive)
Install your new hard drive (this is the hard drive you're transferring your currently installed Operating System TO) into the computer which will be your final computer hardware you're going to settle with. In my case it was a completely different computer tower BUT your may only be transferring your OS to a new hard drive and not changing any hardware so you would install the hard drive into your current computer that you want the larger drive in. Step 2 (live clonezilla media creation)
Using your current computer operating system, we'll use it to create the live usb or livecd of clonezilla. Clonezilla has some tips for creating it HERE. You can not simply copy the clonezilla ISO to a usb stick or to a cd-rom as data, that won't work. You need to use software that writes the ISO to the usb stick or the optical media as well as making the usb stick or optical media bootable. Meaning, the computer BIOS sees it as a bootable device and the computer boots the usb stick or optical media versus the internal hard drive that's in the computer you're using. Once your done creating your live media of clonezilla shut down your computer
Step 3 (backup partitions to image files)
If you made a live cd or live dvd, put it in the optical drive and then turn off the computer which contains the hard drive that you want to transfer FROM. If you created a live usb stick, plug it once the computer is off. Turn the computer on and activate a boot menu if you can (it was F11 on mine), this will allow you to choose which device to boot to, in the case of a live cd, choose the correct optical drive. In the case of a live usb stick, choose the applicable usb stick. It should boot into clonezilla, hit enter to choose the defaults, choose the proper language and hit enter, I clicked "don't touch keymap" for the keyboard setting and hit enter. Choose Start Clonezilla, hit enter. Choose the device-image option (first option), hit enter. The next screen is where you choose where you want to backup your images (what they refer to as being /home/partimag) (NOTE: do NOT choose the new hard drive to store your images onto because it's going to be formatted later on), in my case I was using a 200GB external usb hard drive so that option is local_dev, hit enter. Then choose the folder or directory where the image will be saved to. Click beginner mode as that's the easiest and worked just fine for me. The next screen I choose saveparts option because I had a / partition and a /home partition I need to backup. Then choose the partition you want to create an image of by arrowing onto it and hitting the space bar (it will put an asterisk to signify that's the partition you're backing up), name it appropriately and hit enter. I can't find any screenshots so I am not certain on the next few steps but it should just be hitting enter and then hitting "y" telling it to perform the backup image creation. After it's done, you have the option of powering off, rebooting, starting over from scratch or starting over keeping the same location for storing another image. I choose to start over fresh just in case. So perform the same steps to backup your next partition but obviously this time choose the next partition you want to backup and when it comes time to name it, ensure you choose a different name because the default name will be the same as your first image backup. Hit "y" a few times and it should now create another image but this time of the newly selected partition you choose to create an image of. I only had 2 partitions so I am done with this step but if you have more partitions than keep creating images of them until you're done. Reboot the computer so it boots to your current operating system that you're using. Pfffff, that was a long step. Sorry about that.
Step 4 (live linux-secure-remix creation)
If you don't have a second flash drive just use the same one you used for clonezilla. You'll use the same steps to write the linux-secure-remix ISO to the usb stick as you used during step 1. Remember, use a method that "burns the ISO image" onto the usb stick and makes it bootable as well. Step 5 (partition your new drive)
This step you can either boot into your current OS installation OR insert the live media which contains linux-secure-remix on it into the computer that has the new hard drive. In my case I had to boot the live media since this new computer didn't have a hard drive with any OS in it. If using your current OS installation, than use whatever method needed to partition your new hard drive. This step is important in that you need to partition your new drive the same way your old drive is partitioned, not in size, but the partition numbering. NOTE: the new partitions should be larger than what they are now that you're transferring FROM. Primary and logical partitions need to match. I choose to stick with msdos (MBR) style partitioning versus going to the new GPT partitioning scheme which is required for drives larger than 2TB. MBR works for 2TB drives and lower. Sorry this tutorial won't go into switching from MBR to GPT but I have read it can be done without data loss. In my case I had sda1 as my only primary partition, sda2 was an extended partition which contained sda5 and sda6 as logical partitions. I formatted sda1 and sda6 as ext4. If using a livecd or live usb, then boot the computer and enter the BIOS boot menu so you can choose either the livecd or the live usb stick to boot to. Once booted into linux-secure-remix (it's basically Ubuntu 13.04 with some pre-installed applications) you'll want to open the application called Gparted.
NOTE: If you have more than 1 disk within this computer, ensure you're on the correct one. Follow the steps above for partitioning and ensure the partitions are the same as your old drive you're transferring FROM. Now you're done partitioning the new drive and it's ready to accept the images of your partitions that you're transferring. If you made a livecd then put the clonezilla livecd into your optical drive prior to shutting down. You can shut down your computer as it's time to reboot into Clonezilla.
Step 6 (restore backup'd up images onto new hard drive)
If you created a live usb stick, plug it in. Turn the computer on and activate a boot menu if you can (it was F11 on mine), this will allow you to choose which device to boot to, in the case of a live cd, choose the correct optical drive. In the case of a live usb stick, choose the applicable usb stick. If you can't activate a BIOS boot menu, then go into the BIOS and change the boot order to the proper media, whether it's the livecd or the live usb stick. It should boot into clonezilla, hit enter to choose the defaults, choose the proper language and hit enter, I clicked "don't touch keymap" for the keyboard setting and hit enter. Choose Start Clonezilla, hit enter. Choose the device-image option (first option), hit enter. The next screen is where you choose where you stored your images (what they refer to as being /home/partimag), in my case it was the 200GB external usb hard drive so that option is local_dev, hit enter. Then choose the folder or directory where the images were saved to. Click beginner mode as that's the easiest and worked just fine for me. The next screen I choose the restoreparts option because now we're "restoring a partition" to the new hard drive. Choose the image you want to restore, this will be your first image you created of your first partition, hit enter. Now choose the destination, which should be your first partition on your new hard drive, most likely sda1 if the new hard drive is your only hard drive in the computer. NOTE: ensure you choose the correct hard drive and partition as this will overwrite whatever is there with your backed up image and hit enter. There may be a few more enters or it's asking you a couple times if you're 100% positive that you want to perform this action since it's going to overwrite whatever is on the "target partition" with what's in the image file. Hit "y" if you're sure and off you're running. Once done you have just restored your first partition from your old smaller drive to your new larger drive. Perform the same steps again for anymore partitions that you imaged and then you're done restoring images onto the new hard drive. We're almost DONE. You can attempt to reboot your computer removing the clonezilla live media but I am betting it doesn't boot into your OS, I had a flashing cursor in the upper right corner and that was it. No Xubuntu for me.......YET.
Step 7 (fixing your MBR/boot loader, most likely grub2)
I realized after the fact that if we had chosen advanced options when backing up the partitions to image files and the advanced options when restoring we may not have needed this step but I choose beginner so it is what it is and we need to install grub2 to the MBR so that the BIOS passes on the hardware to a bootloader which will then boot the installed OS. This is done using linux-secure-remix. So put it your linux-secure-remix livecd or livedvd in the optical drive OR plug in your live usb stick and boot the computer to one you created. Once inside linux-secure-remix we need to run the boot-repair application
Choose the recommended repair which is what fixed mine. When it shows you a URL for where it uploaded the boot-repair log file, write it down so in case this doesn't work, you can obtain help from others and point them to the boot-repair log file which will help others figure out why it's not working. You should now reboot your computer removing whatever live media you were using and it should now boot into your Operating System.
That's it, YOU DID IT! Congrats. I hope this was helpful to someone. Leave me a comment if I missed something somewhere or to say thank you if this helped you.
Controlling XBMC from your couch can be achieved in many ways. The easiest solution would be to just get a wireless keyboard/mouse combo but us Linux users don't often go for what's easiest. We enjoy tinkering around and learning new things otherwise we'd just be using Windows in the first place. We like to innovate, at least I do. The next easiest thing to do would be to install an XBMC Remote control app on your smartphone, the Official XBMC Remote control app from joethefox is FREE within the Apple Store. There are other paid XBMC remote apps but the FREE one works just fine when tested on my iPhone 4S running iOS 6.1. However this post will be about getting an old ATI Remote Wonder working in Linux XBMC. I believe there are a couple different variations of the remote but the one that I have is pictured below, if yours looks different then your mileage may vary.
First let me inform you what versions of everything I am performing this on.
Ubuntu = Ubuntu 12.04.2 LTS (running mythbuntu-desktop cause I dislike Unity)
Kernel = 3.2.0-40-generic i686
XBMC = 2:12.2~git20130502.1706-frodo-0precise (obtained from team-xbmc PPA)
This tutorial will mostly be done using a terminal session, if you're scared of the terminal don't be. I will try to explain what each command does and why sudo (root priveleges) are required. When you first plug in your ATI Remote Wonder usb receiver most likely the kernel will automagically load the "ati_remote" module and what that does is basically make the remote act like a mouse. If you used the large circular pad towards the top of the remote you'll see it moving your mouse and such. We don't want that so let's remove that module by issuing the following command. Sudo is required due to removing a module which interacts with the kernel but don't worry as that kernel module was only loaded because it sensed the usb reciever when it was plugged in. Normally that's a good that the kernel automagically loads modules when hardware is plugged in but in this case we don't want that functionality. Whenever you use sudo it asks for your users password, enter it and press the 'enter' key. It doesn't show you that you're entering any letters but you are in fact typing in your password. sudo rmmod ati_remote
If it says it can't remove it because it's in use then just ignore that and continue on with the tutorial. Now we need to make it so when we reboot the machine that module doesn't automagically load, this is done by editing a configuration file. Since this config is located within the /etc/ directory and is owned by root, we'll again need root privileges so we'll be using sudo but since we're opening a GUI (Graphical User Interface) application, we want to actually use 'gksudo'. This is the command (NOTE: gedit is the default GUI text editor for Ubuntu, if you're using Kubuntu it is kate I believe. I am using Mythbuntu so the GUI text editor is actually called mousepad for me. Replace the gedit command with whatever GUI text editor your distribution uses. gksudo gedit /etc/modprobe.d/blacklist.conf
Once the file opens in your GUI text editor we're going to add the following text in red to the very bottom of the file #to get ATI Remote Wonder working blacklist ati_remote
The pound symbol is used for comments and isn't read as a configuration line. Save the file and close the text editor. Restart your computer ONLY if you previously couldn't remove the ati_remote module. When you restart it won't load this time because you blacklisted it. Now we need to install lirc which stands for 'Linux Infra-red Remote Control'. We again will do that from the terminal session and require sudo because installing software requires root privileges. Type in the following command: sudo apt-get install lirc
Choose 'Y' if it asks you if you're sure you want to install the software. If lirc was already installed and you'd like to reconfigure it you would use the following command: sudo dpkg-reconfigure lirc
It will bring up a debconf window. Debconf stands for debian configuration, most applications within Ubuntu are of the .deb extension and is the common package management tool used within Debian based Linux distributions. Within the debconf window using the up and down arrow keys, highlight the ATI/NVidia/X10 RF Remote (userspace) option and then click tab so that the '<Ok>' option is highlighted, then click the 'enter' key on your keyboard. The next window that appears is for a transmitter but we aren't transmitting anything so highlight 'None', click tab so that the '<Ok>' option is highlighted, then click the 'enter' key on your keyboard. If everything went ok lirc should have been installed and the proper config files should be in place. Now we just have to let XBMC know that we'll be using a remote instead of a keyboard to control it and that's done using a config file, Lircmap.xml which will need to be stored within your users .xbmc folder. To do this we don't need root privileges because we're writing the file within our own home directory which we have write access to. The tilde (~) is a short way of entering your users home directory, which is /home/yourusernamehere/, so the whole path is actually /home/yourusernamehere/.xbmc/userdata/. The command is as follows: gedit ~/.xbmc/userdata/Lircmap.xml
I uploaded my Lircmap.xml to pastebin, you can download the file from this link: Lircmap.xml
Note the 'L' is capital, that's important for the filename. So that button presses don't register twice I had to edit the advancedsettings.xml file located within my users home directory .xbmc/userdata/ and add the following lines. You may or may not already have an advancedsettings.xml file, if you don't have one just create it, if you already have one just add the single line for the remotedelay as you probably already have the top and bottom <advancedsettings> lines. <advancedsettings> <remotedelay>10</remotedelay> </advancedsettings>
That should be it, fire up XBMC and your ATI Remote Wonder should now be working. If you want to know which button on the remote does what within XBMC just look at the Lircmap.xml file with a text editor. Example being the "back" command in XBMC is performed with the remote button 'c' as per the following in the Lircmap.xml file <back>c</back>.
Linux gaming is slowly making strides to become more mainstream. Valve opened the public BETA, Steam for Linux, back in late 2012 which has brought many titles to the Linux gaming platform. There has even been a Humble Bundle which featured many Linux titles and now Valve has released their popular puzzle game, Portal, to run natively within Linux. I have read that Portal 2 is coming to Linux soon as well.
Portal originally came out in 2007 for the PC and Xbox 360. It was later released for Playstation 3 as well as the OS X Operating System. It is of the First Person Puzzle/Platformer genre. It involves the creation of "portals", using a portal gun, to move yourself and possibly objects around a level so that you can get to the exit. It requires some real brain power at times which is what puzzle games are made for. Thinking outside the box will allow you to excel while playing Portal.
It is available thru Steam for Linux now for only $9.99 USD. I happily paid the money and am already enjoying the game thoroughly. I am playing it on Xubuntu 12.04.2 64bit version with an Nvidia 8400GS ando only 2GB of DDRII Ram. The game doesn't require too beefy of a machine as you can see by my computer's specifications. My CPU is only an E4300, 1.8Ghz Core2Duo so I can assure you that you don't need much to enjoy the game. Are you going to purchase the game for Linux and show your support for Linux Gaming?
Crysis 3 came out on Tuesday, February 19th 2013 and they are already having DOUBLE XP so you can rank up faster.
I am thoroughly enjoying this game and sadly people aren't even giving it a try for whatever reason. Whether is's because they only play Call of Duty or because they haven't even heard of it. Crysis 3 is more of a hybrid First Person Shooter because your character has a nanosuit which allows you to have armor and cloaking capabilities. The map designs are excellent in my opinion and they have complex elevation changes and are not just simple maps with a flat playing field. There are also map interactions like being able to use items found throughout the maps like cars, poles, and air duct vent panels.
Have you purchased Crysis 3 yet? Here are some videos I created to help if you're new to the game.
Steam is having a huge Sale in Celebration for Steam for Linux. Linux game titles are from 50% all the way up to 80% off. Despite the sale stating it was as high as 75% off, I saw Serious Sam 3 BFE for 80% off, which brings it down to a mere $7.99 which is normally a $39.99 game.
There are now 100 items within Steam's Linux section. I am very excited about this. Here is just some of the games on sale;
Intrusion 2 = 66% off brings it to $3.50
Serious Sam 3 BFE = 80% off brings it to $7.99
4th Year Anniversary World of Goo = 75% off brings it to $2.49
Trine 2 = 75% off brings it to $3.74
Half Life = 75% off brings it to $2.49
Counter Strike Source = 75% off brings it to $4.99
Bastion = 75% off brings it to $3.74
Amnesia = 75% off brings it to $5.00
This is an awesome sale and I picked up Intrusion 2 and Bastion for a mere $7.24. What will you be picking up?
There is some great news for us Linux and Free Open Source Software (FOSS) advocates, there's a new tool that will let you run Linux on devices built for Microsoft's Windows 8. The Linux Foundation Secure Boot System will allow Linux to run on computers using the Unified Extensible Firmware Interface (UEFI) firmware.
Microsoft's Windows 8 runs on new hardware controlled by UEFI firmware, which provides "secure-boot" technology. Although UEFI seeks to secure computers against malware by requiring a trusted key before booting, it has presented problems for other operating systems. Many in the Linux community feared that OEM may not provide a UEFI off-switch, effectively barring Linux from running on UEFI-enabled machines but now the latest releases of many major Linux distributions include a bootloader to work with UEFI, such as Ubuntu 12.10 and Fedora 18.
Linux Foundation technical advisory board member James Bottomley has been quoted saying the following, "The Linux Foundation wishes not only to enable Linux to keep booting in the face of the new wave of secure boot systems, but also enable those technically savvy users who wish to do so to actually take control of the secure boot process by installing their own platform key. The Linux Foundation bootloader provides a hash code certified by Microsoft, and supports the infrastructure to boot a generic Linux kernel. We have in place a protocol where Microsoft hands off the initial Microsoft signed EFI binary load to separately verified EFI binary chain, which individual distributions control. We did this because our mission is to enable any bootloader in the Linux ecosystem to work with secure boot."
I am very pleased to see there is a work-around for the new UEFI firmware so that I can install Linux on a machine or motherboard destined for Windows 8. Many of the newer motherboards are coming with UEFI and secure boot so this is great news for us Linux users. Does your motherboard have UEFI and secure boot?
Thanks to the hard work of a new team of hackers known as Evad3rs, the Jailbreak, called "evasi0n", works on all versions of iOS from 6.0 thru 6.1, and it supports all current iOS 6.1 devices except for the third generation Apple TV. According to the Evad3rs team the following devices are supported:
iPhone 5
iPhone 4S
iPhone 4
iPhone 3GS
iPad 4
iPad 3
iPad 2
iPad Mini
iPod Touch
iPod Touch 5
iPod Touch 4
Apple TV 2 (NOT 3rd generation)
The unteathered status means that you can safely reboot your device without having to have it "tethered" to a computer in order for it to remain jailbroken and work. The tool is available for Mac OS X (10.5 or later), Windows XP or newer, and Linux from the Evasi0n Website. One thing that they are suggesting is that you should update to the latest firmware for your device but not using the OTA (Over the Air) method but you should download the firmware thru iTunes and update your device through iTunes. They are also recommending that you should fully back up your data via iCloud or iTunes.
I am very excited about this as I have been waiting for an unteathered Jailbreak since I got my iPhone 4 back in December of 2011 and now I have an iPhone 4S and can't wait to "release" it from the grips of Apple so that I can take full advantage of the hardware and it's capabilities by using apps from the most popular repository for community developed applications, Cydia. Will you be jailbreaking your iOS device?
Here's a tutorial I put together which shows how to update to the latest firmware and then perform the evasi0n jailbreak within Xubuntu 12.04.
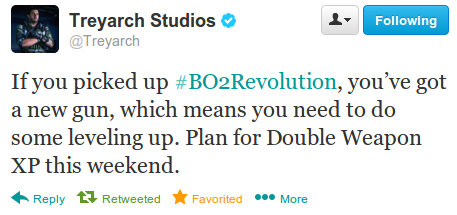
Treyarch's twitter account tweeted out at around 1 pm Central Time on 1-31-2013 that this upcoming weekend there will be Double Experience Points for Weapons.
This is great news due to the recent Revolution Map Pack release which for the very first time in Call of Duty history included a gun, the Peacekeeper. It's a Small Machine Gun and Assault Rifle Hybrid. This weekends Double Weapon XP will mean that you earn double the amount of experience points when using your weapons. This will allow you to get attachments much faster and be able to "level up" your weapons quicker. This will allow you to apply your clan tag on your gun and if you level it up again, it allows you to apply your player card emblem.
Are you excited for this weekend's Double Weapon XP?
The ability to stream Call of Duty Black Ops II straight to your Twitch.tv account is now possible. You will be able to stream yourself playing either League Play or Public Matchmaking. Activision worked closely with Twitch to use its SDK (Software Development Kit) to make the streaming service automatically available. It requires no additional hardware.
Gamers will only need to enter their Twitch.tv account information within Black Ops II menu to begin streaming to the Twitch.tv website and viewing apps. Twitch has a FAQ section which does state they recommend 3mbps (megabits per second, which is 3,000 kbps) upload speed from your ISP. You can determine what your upload speed is by going to SPEEDTEST.net. Gamers can also share their streams through various social media networks like Twitter and Facebook after you link them within the Black Ops II settings menu, allowing friends to easily tune into their gaming sessions. In addition to streaming gameplay, viewers will be able to check out additional information about broadcasters, including class loadouts, recent match statistics, as well as career statistics across all supported Call of Duty games on Call of Duty Elite.
The broadcasting capability will be available to Xbox gamers only at launch but Twitch expects the feature to soon come to PS3 and the desktop versions of the game. I was informed by twitter handle, @konaskorner, who does high quality streams of various games to Twitch, that the resolution is only 360p. In addition to the game video, users will be able to hook up headsets and xbox 360 compatible video cameras (the kinect for example) to capture their audio commentary or video reactions as they stream their multiplayer session to Twitch. Here is a short video created by an employee at Twitch who goes by the twitter handle @MrErnestLe
This is a very neat feature that will be built into Black Ops II but if you desire to provide your viewers with a better resolution than a mere 360p you'll be better off just getting a dedicated capture device and streaming through your computer. Are you excited for this new feature?
The twitter account @treyarch just tweeted out that Call of Duty Black Ops II will have DOUBLE XP for this upcoming weekend. Starting at 10am/PST on January 25th 2013 and going until January 28 at approximately 10am/PST. It will be available for all platforms including Xbox 360, PlayStation 3, PC, and the Wii.
I am very excited about this upcoming weekend because I was planning on pushing the prestige button once another DOUBLE XP weekend came around and here it is! HOORAAHHHH!!!
For those of you who are living under a rock, Kim Dotcom launched his new file-sharing website this past weekend called MEGA. It supposedly provides 50GB of FREE online storage with encryption capabilites.
The encryption "is less then ideal", according to Allan Woodward, from the Department of Computing at the University of Surrey. It's because it is all done through Javascript within a web-browser, which means that anyone who can break the SSL encryption on Mega could get a hold of the keys. The SSL encryption being used is only 1024-bit encryption, which can be broken easier then say 2048-encryption which is viewed as best-practice amoungst security experts.
Deduplication is another area of a possible security vulnerability. Deduplicaion of encrytped data requires that information to be decrypted, repackaged and then encrytped again. Basically this means that the files have the opportunity to be seen by someone if there was a man in the middle at which point the data was in the process of being decrypted and then repackaged and encrypted again.
Mega also uses Javascript's pseudorandom-number generator to produce keys which is also an issue as it is a method known to be predictable.
Last but not least is that currently a user has no way to recover their account if they forget their password. Mega has promised to let users reset passwords soon. So if you lose or forget your password, say goodbye to your files regardless of the level of encryption.
Keeping in mind all the security issues I have listed above, will you still use Mega to house your files? I am still undecided on whether I want to use the service and if I do, what files I may store there.
A year ago today the popular file sharing website Megaupload.com was shutdown by the United States Department of Justice following the indictment and arrests of the owners for allegedly operating as an organization dedicated to copyright infringement.
Today Kim Dotcom, legal name being Kim Schmitz, has launched a new file-sharing site, called Mega. It's located HERE but currently I couldn't access it as it's being pounded by users. He tweeted out that he has already had 100,000 new user accounts created within the first hour.
It will provide a cloud file system, including cross-account folder sharing for easy online collaboration. The Mega service encrypts and decrypts you data transparently in your browser, on the fly. High speed parallel batch uploading and downloading with resume capability are key features of the site. Thanks to encryption, Mega can connect a large number of hosting partners around the world without worrying about privacy breaches. Everyone can go to Mega to sign up and use the service, with a basic, free offering of 50GB of storage, plus three pricing tiers with additional storage and bandwidth capacity.
I myself don't condone using pirated software, movies, or music but that's not the only use of a site like this. Will you create an account and use this new service?
Google+ Hangouts has the ability to do a group chat with full video and audio, on the web or in mobile apps, for free which is unmatched by any other service. Group chat is great but sometimes you may want to broadcast just yourself, previously you would be displayed in the main window but also in a smaller window along the bottom which is the participant strip. If you think about it, it was quite useless to have the participant strip along the bottom if you were the only person in the hangout.
Now, for these single participant streams, Google is making it possible to push the video to the entire window, maximizing the used space. It is now the default functionality, Google has updated their Google+ Hangouts functionality so that when there is only 1 broadcaster in the hangout, they are now presented in a full window.
I think this is a great feature which will allow the screen space to utilized by a broadcaster to it's fullest potential. Hopefully someday soon I will host a Google+ Hangout to chat technology related things with my subscribers and twitter followers.
Google has released an updated version of their internet browser, Google Chrome. It's now version 24 for Windows, Linux, and Mac. There are no real new features, just speed improvements and security fixes.
The biggest improvement on the user side of things is the speed increase. Google's own Octane JavaScript test shows that this is the fastest Chrome release yet. There have been some improvements for developers, Google has made sure the HTML 5 datalist element now supports suggesting a date and time and has also added support for MaathML. On the security side Google has fixed 24, yes that's right, 24, sort of ironic don't you think, bug fixes that can be read HERE in the SVN revision log.
I am excited for this new version as it appears they have fixed a lot of security issues. You can download it HERE. We all know that browser security is almost the most important security on your computer as that's where most exploits lay on the internet.
Valve has kept pretty quiet regarding a console in development. There has been rumors for a while now that Valve will integrate it's digital platform Steam into a console-like piece of hardware.
In December 29th of 2012, German site Golem.de claims they attended a conference where Ben Krasnow, a Valve electronics engineer, gave a talk on the company's plans for the console. I used Google Translate to understand some of the article;
The Valve developed PC-game-console Steam Box will seemingly be based on Linux, not Windows. And it's not the only exciting hardware project, that Valve will present in 2013.
It doesn't come off as a huge surprise, considering that Valve-boss Gabe Newell views Windows 8 as a catastrophe: Steam Box will not be based on Windows, but on Linux instead. This was confirmed by Ben Krasnow, one of Valve's hardware developers,
But according to him, there's more than just the introduction of the Steam Box: "the hardware lab has some secret projects that will be released in 2013. We have a good group of electronic- and mechanical-engineers and we are glad to build some really cool things", says Krasnow. In summer of 2012 Valve's higher up critised a frustrating lack of innovation in the area of computer hardware - in a job offer. In that they also wrote: ".....we want to change this."
Image Source: Polygon
Image Source: Polygon
Basically the key points are that; Valve's Steambox is scheduled to come out this year and it will run Linux at its core. So what version of Linux will it run? Given how closely Canonical and Valve have worked together over the last 12 months, and that Canonical has a vested commitment to Ubuntu as a platform, the logical choice would be Ubuntu. Ubuntu can be run free of a GUI but would also free Valve from the duties of distribution maintenance.
A prototype is actually being revealed at CES 2013 (Consumer Electronics Show) in Las Vegas, Nevada. It is being dubbed, "Piston". Valve has teamed up with hardware vendor Xi3 to build the miniature modular PC.
Are you excited for this console or will you be keeping an eye out for the newer Xbox or Playstation models?
Midwest Gaming Classic will be held on Saturday, March 23, 2013, from 10:00am to 8:00pm and Family Day Sunday, March 24, 2013, from 10:00am to 5:00pm. It will be held at the Sheraton Milwaukee, Brookfield Hotel in Brookfield, WI. You can learn more about the event at their WEBSITE.
One of the most popular attractions at the Midwest Gaming Classic each year is the Gaming and Computing Museum. The museum features everything from Pong to the PS3, with ultra-rare systems like the Super A'Can sitting near really common systems like the PS1. Unlike a lot of "museum" displays, the Midwest Gaming Classic's museum is almost entirely interactive! If you want to remember playing a game on an Odyssey 2 or want to check out something new, you can actually try it!
And speaking of something new, the Museum has just the thing for modern gamers this year! A brand new room, the Modern Game Room, will open this year! The room will feature multiple HDTVs and game consoles such as the Wii U, PS3 and Xbox 360. Check out some of the most popular games on these new consoles, or test your skill against other players. There will be two multi-console LANs set up for gamers to face off against one another.
While the word classic is in the title, the Midwest Gaming Classic believes that any game can be a classic... it all depends on how you remember it, and we hope that this new Modern Game Room will give you lots of memories that you will look back on as classics in the future!
A reminder - If you haven't purchased tickets yet, there is no better time to do so than now! The Modern Game Room was made possible in large part by the strong pre-sales that we have already had. We are hoping to add significantly more content, and the best way that you can help us to do so is to pre-order your tickets now! Also, Sunday tickets are currently just $10, but will go up to $15 on January 23rd, so pre-order now!
They have got many, many more announcements that will be coming in the weeks ahead, so make sure to start checking their site regularly!
Information for the first Downable Content for Call of Duty Black Ops II has been leaked, it is being called "Revolution". The store advertisement has January 29th at the top of the sign and states "First on Xbox Live". So there is no telling when PS3 owners will be able to download the DLC.
You can notice in the picture that there are 4 new Multiplayer maps which are called Hydro, Downhill, Grind, and Mirage. The fifth map is for Zombies Co-Op which is called Die Rise. There is also a weapon in this DLC called the Peacekeeper but it's not known whether the gun will be for Zombies Co-Op or added to multiplayer. There has never been a gun added in DLC for multiplayer in the past so it is believed that it's only for Zombies Co-Op gameplay.
You can buy a Season Pass for $49.99 which would save you $10.00 versus buying all four map packs seperately which normally cost $15.00/each. Will you be purchasing the first of four DLC map packs or will you purchase the Season Pass? I will be purchasing the Season Pass myself.
If you're really into gaming on the Xbox 360 and want to have a slight advantage over your foes then consider buying a better controller. Razer has just announced a new controller in their lineup named the Sabertooth.
The Sabertooth, which according to the company, is the successor of the Razer Onza. It will come with six additional buttons on top of the default buttons that are on normal Microsoft controllers. It includes two additional buttons on the shoulders, two removable rocking switches at the bottom of the controller, giving you more options to choose from and picking a setup which you find the most comfortable. The Sabertooth will also sport a small OLED display at the bottom that you can program to display a variety of messages. Other features of the Sabertooth include a quick-release USB connector, a lightweight detachable fiber cable, a carrying case, and a 2.5mm audio jack.
The Razer Sabertooth is available for purchase at Razer's Website for $79.99. Go head on over to get one for yourself if you feel it'll give you advantage over your opponents.
If you go to www.ubuntu.com quickly you'll see a counter which is counting down to approximately noon Central time or 1 pm Eastern time.
There hasn't been any information leaked as to what it will be but the page with the timer has the following statement around the clock, "So close, you can almost touch it." Which leads me to believe they are releasing a "touch" enabled device to the public.
With the Unity interface already appearing as a touch friendly interface, I would not be surprised to see Ubuntu on mobile and tablets within the very near future. In fact, back in late 2011, Mark Shuttleworth, who is the owner of Canonical, stated in a blog, "By spring of 2014, version 14.04 LTS "will power tablets, phones, and smart screens from the car to the office kitchen, and it will connect those devices cleanly and seemlessly to the desktop, ther server, and the cloud."
What do you think will be revealed in less then an hours time by Ubuntu?
UPDATE: Ubuntu for phones is what the announcement was. You can learn more about it HERE. I suggest you watch this awesome video to learn more about Ubuntu being on ALL devices eventually. It's a virtual keynote speech by Mark Shuttleworth.
 I was happy to see that Serious Sam 3 BFE (a first person shooter) had controller support. Most Steam games will denote whether a game has controller support or not. Sometimes it may say "Partial Controller Support". I am not certain what that means but some controller support is better than none in my opinion. I took a chance and bought the game. When I fired it up my After Glow Xbox 360 Controller was supported immediately upon turning on the game. This is with a default Ubuntu 12.04.3 installation, it uses the xpad module (driver) and I didn't have to install the xboxdrv module (driver) which is a userspace driver. There are some advantages to using the xboxdrv module but I won't cover those in this post.